Save
Save The first time I whipped up this Rosé Velvet Cake, I had music playing a bit too loudly and accidentally dropped a puff of cloud-like flour onto the kitchen floor. The blush tint that gradually bloomed as I stirred in pink food coloring made me pause and grin—it felt like being in on the secret of a perfect celebration. There’s something oddly endearing about the sound of cake pans tapping against the counter while prepping for a gathering. The air took on this velvety, gently sweet scent, a hint of rosé floating just beneath the sugar and vanilla. Sometimes, a cake feels as dressed up as the occasion itself.
One spring, I baked this cake with a good friend for her sister’s bridal shower. We giggled over gold luster dust mishaps and ran our fingers along the chilled frosting, eager to see if our makeshift paintbrush would work. Turns out, laughter really does make the cake taste sweeter—so does sneaking a little extra rosé into the batter. The kitchen light bounced off the edible flowers we scattered on top, making the whole cake glisten. That afternoon, we celebrated more than a bride—we toasted all the giggles in between.
Ingredients
- All-purpose flour: Sifting is a must for extra airy layers, so don’t skip it even if you’re in a rush.
- Granulated sugar: Creaming this well with butter is the foundation for a plush crumb.
- Baking soda & baking powder: They team up to create just the right rise, especially with all those wet ingredients.
- Salt: Even a small pinch sharpens all the sweet notes and balances the rosé.
- Unsweetened cocoa powder: Just enough to deepen the flavor without turning this into a chocolate cake.
- Unsalted butter (cake & frosting): Always aim for room temperature for the dreamiest consistency.
- Buttermilk: Adds tang and keeps the crumb moist (don’t swap with regular milk if you can help it).
- Rosé wine: Start with something crisp and fresh—don’t bother with a fancy bottle.
- Eggs: Bringing them to room temp stops the batter from seizing up and helps everything blend.
- Vanilla extract: A generous splash gives subtle warmth and ties the flavors together.
- White vinegar: Reacts with the leaveners for height and lightness, you won’t taste it in the end.
- Pink food coloring gel: Gel gives pure color without thinning the batter; add sparingly and build up.
- Cream cheese (frosting): Let it soften ahead of time to avoid lumps in your frosting.
- Powdered sugar (frosting): Sift for ultra-smooth, cloud-like frosting that’s ready for swooshing.
- Heavy cream (gold drip): Brings the white chocolate to the glossy texture that drips perfectly.
- White chocolate chips (gold drip): Melted with cream, they’re the ideal canvas for shimmer.
- Edible gold luster dust & vodka/clear extract: Mix for a quick-drying, stunning gold accent that photographs beautifully.
Tired of Takeout? 🥡
Get 10 meals you can make faster than delivery arrives. Seriously.
One email. No spam. Unsubscribe anytime.
Instructions
- Prep the pans and oven:
- Get your oven humming at 350°F (175°C) and line your cake pans—don’t skimp on parchment, it saves the layers from sticking nightmares.
- Whisk the dry ingredients:
- Sift flour, cocoa, baking soda, baking powder, and salt into a bowl so no sneaky lumps hide in the final cake.
- Cream butter and sugar:
- Beat until it looks pale and pillowy, which will set you up for that perfect crumb.
- Add eggs and vanilla:
- Mix in eggs one at a time, scraping down the bowl, then add vanilla—your kitchen’s about to smell wonderful.
- Mix in the liquids:
- Gently pour in buttermilk, rosé, and vinegar while mixing, enjoying the splash and swirl of scents.
- Combine the batter:
- Fold dry ingredients in slowly, switching to a spatula at the end to avoid overmixing.
- Add blush color:
- Swirl in pink gel little by little, watching the batter shift to that signature blush right before your eyes.
- Bake the cakes:
- Divide the batter between pans, then bake for 30–35 minutes, until a toothpick comes out mostly clean and edges pull slightly away.
- Cool the layers:
- Let them cool ten minutes, then turn out onto racks; the cake smells even better as it cools.
- Prepare the frosting:
- Beat softened butter and cream cheese until super smooth, then add powdered sugar in clouds, followed by rosé, vanilla, and salt.
- Frost and assemble:
- Level your layers if needed; stack and spread with frosting, cover in a crumb coat, chill, then finish with a final swoop.
- Make the gold drip:
- Melt white chocolate with heavy cream, cool slightly, then drip down the sides for drama.
- Paint with gold:
- Mix luster dust with vodka or clear extract, then paint those drips for a gilded finish—channel your inner artist.
- Chill, then serve:
- Rest the finished cake in the fridge for at least 30 minutes to set the frosting and drips before slicing.
 Save
Save  Save
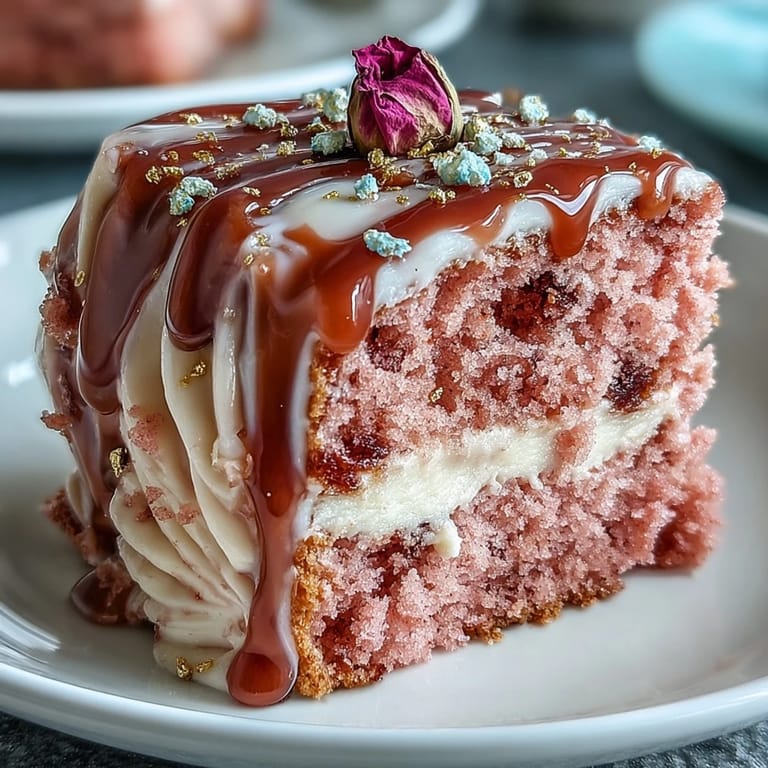
Save When we first cut into the finished cake, the room filled with oohs and delighted whispers as the gold shimmer caught every light. That moment reminded me how a homemade cake can elevate any occasion into something people remember long after the plates are cleared.
Making It Party-Ready
Chilling the cake between steps helps keep those blush-pink layers perfectly aligned when stacking. If you press edible flowers or fresh berries onto the freshly frosted cake, it instantly looks like you’ve had a secret from a professional baker up your sleeve. Don’t forget to step back and admire the gold drip before serving—it’s worth the extra attention.
Getting the Perfect Blush Color
I always add the food coloring last, using a toothpick to dip small amounts into the batter. Adjusting in tiny amounts keeps the hue delicate, and I learned the hard way that a heavy hand can turn the blush tone much bolder than intended. If you’re unsure, bake a test cupcake from the batter first. The color deepens slightly as it bakes, but with gel coloring you can control it beautifully. Trust your instincts—and the soft light in your kitchen window.
Decorating Without Stress
The drip step used to scare me the most, but carefully spooning the gold-dripped chocolate down chilled cake edges works magic. If you’re nervous, practice on a plate before touching the cake. Painting gold is easier than you think.
- Let drips cool and set before painting, or color will smudge.
- Hold your brush lightly, like writing your name on foggy glass.
- Don’t overthink the finish—a few imperfect drips always look charming.
 Save
Save  Save
Save However you decorate it, this Rosé Velvet Cake brings joyful drama and just enough sparkle for any celebration. I hope it becomes the star of your next gathering—gold fingers and all.
Questions & Answers
- → How can I boost the rosé flavor?
Brush cooled layers lightly with reserved rosé or a rosé-syrup (equal parts rosé and sugar, simmered) before filling. Add the wine to the frosting in small amounts and taste as you go to avoid slackening texture.
- → Is there a non-alcoholic alternative for the rosé?
Use sparkling grape juice or a concentrated white grape reduction in place of rosé. Reduce the liquid slightly elsewhere to maintain batter and frosting consistency.
- → How do I get an even blush-pink color?
Use gel food coloring and add a tiny amount at a time, mixing thoroughly between additions. Gel gives vibrant color without thinning the batter; start with a pinch and build up to the desired blush.
- → What’s the best technique for a smooth gold drip?
Make the drip from white chocolate and heavy cream, cool until slightly thick but pourable, then apply to chilled cake edges with a spoon or squeeze bottle. Once set, mix edible gold luster with a small amount of clear spirit or extract and gently paint the drip with a food-safe brush.
- → How should I store and transport the cake?
Refrigerate the frosted and decorated cake until firm. For transport, keep it chilled in a flat-sided box, secure the base, and drive on a level surface; remove from fridge 30–60 minutes before serving to soften slightly.
- → Can this be adapted for dietary restrictions?
Use a gluten-free flour blend designed for cakes to replace all-purpose flour, and swap dairy for plant-based butter and cream cheese alternatives. For egg-free, try a commercial egg replacer or flax egg, but expect slight texture changes.