 Save
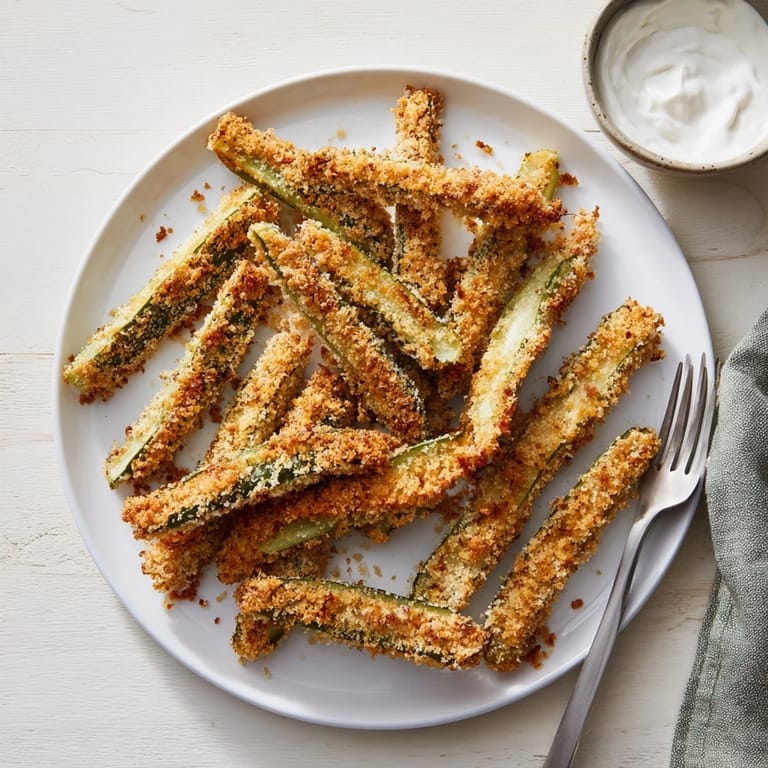
Save The first time I encountered fried pickles was at a roadside dive in Mississippi, where the bartender slid a plate toward me with a wink and said trust me. I was skeptical—who fries a pickle?—but one crunch later and I was hooked. That perfect contrast between the cold acidic spear and the hot salty crust still blows my mind. Now I make them at home whenever the craving hits, which is more often than I care to admit.
Last summer, I made a triple batch for a backyard barbecue and watched my pickle-hating father-in-law accidentally eat half the plate. He kept asking what these crispy zucchini sticks were, and when I finally told him they were pickles, he just shrugged and reached for another. Sometimes the best reactions come from people who have no idea what they are eating.
Ingredients
- 8 large dill pickle spears: Drain them thoroughly and pat completely dry with paper towels, because any moisture will make the breading slide right off
- 1 cup all-purpose flour: This creates the dry base that helps the egg wash stick to the pickle surface
- 2 large eggs: Whisk these with milk to create the perfect glue for your breadcrumb coating
- 2 tablespoons milk: Thins the egg mixture just enough for easy dipping without making it too runny
- 1 cup breadcrumbs: Panko gives you that extra shattering crunch, but regular works perfectly fine too
- 1 teaspoon garlic powder: Adds a savory depth that cuts through the pickle acidity
- 1 teaspoon paprika: Brings a subtle smokiness and beautiful golden color to the coating
- ½ teaspoon cayenne pepper: Optional, but I love the gentle heat that lingers after each bite
- ½ teaspoon salt: Enhances all the flavors without overpowering the pickles natural brine
- ¼ teaspoon black pepper: Adds just a hint of warmth and complexity
- Vegetable oil: You need about 2 inches in your pot to fully submerge the spears without crowding
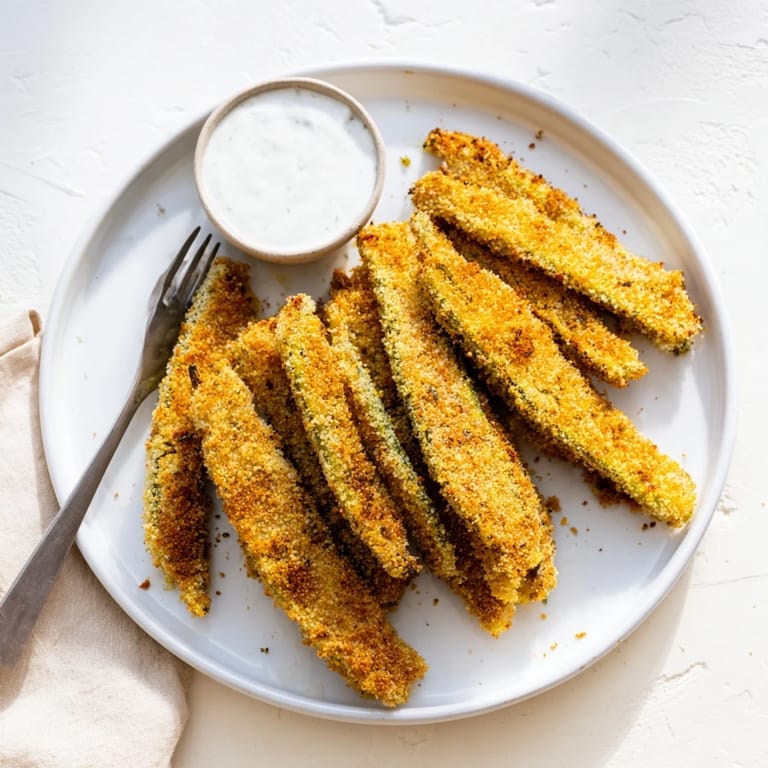
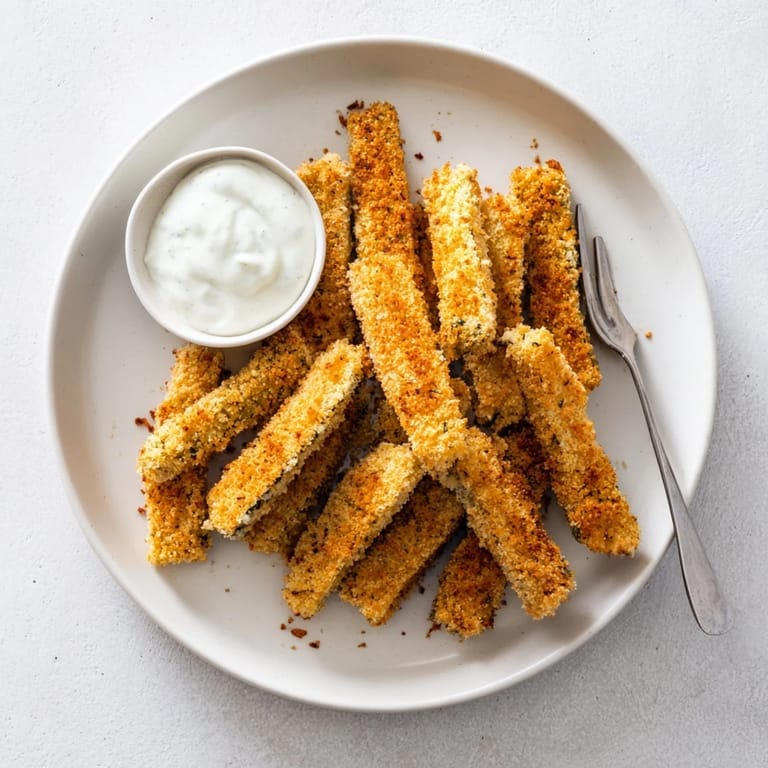
- ½ cup ranch dressing: Cool and creamy, this is non-negotiable for the full experience
Tired of Takeout? 🥡
Get 10 meals you can make faster than delivery arrives. Seriously.
One email. No spam. Unsubscribe anytime.
Instructions
- Get your oil ready:
- Heat the oil to 350°F in a deep fryer or heavy pot, using a thermometer to ensure it stays in the sweet spot for perfectly crisp results
- Set up your dipping station:
- Arrange three shallow bowls with flour first, then the egg-milk mixture whisked together, and finally the breadcrumbs mixed with all your spices
- Coat each spear:
- Dredge pickles in flour shaking off excess, dip in egg mixture letting the extra drip off, then press firmly into the seasoned crumbs until thoroughly coated
- Fry in batches:
- Carefully lower a few spears at a time into the hot oil, turning occasionally until they are golden brown and crispy, about 2 to 3 minutes
- Drain and serve:
- Remove with a slotted spoon and let them drain on paper towels while you fry the rest, then serve immediately with that cool ranch on the side
 Save
Save My teenage son started requesting these for his birthday dinner instead of cake, which says something about how good they are. We stand around the stove together, eating them straight from the paper towels and burning our fingers because waiting is simply not an option.
Getting That Perfect Crunch
The secret restaurant-style texture comes from pressing the breadcrumbs onto the pickles rather than just rolling them. I learned this the hard way after several batches where half the coating fell off in the oil. Now I gently press and pat until each spear is completely and evenly covered.
Oil Temperature Matters
If your oil is too cool, the pickles will absorb grease and turn soggy. Too hot, and the coating burns before the pickle heats through. A clip-on thermometer eliminated all the guesswork for me, and now every batch comes out restaurant-quality.
Make-Ahead Tips
You can bread the pickles ahead of time and refrigerate them on a wire rack for up to two hours before frying. They actually hold up remarkably well, which means you can prep before guests arrive and fry fresh right before serving.
- Keep fried pickles warm in a 200°F oven while you finish the remaining batches
- Leftovers can be reheated in an air fryer at 375°F for about 3 minutes to restore some crunch
- Experiment with different pickle varieties—bread and butter pickles add a sweetness that is surprisingly good
 Save
Save These never last long enough to become leftovers in my house, and I bet they will not in yours either.
Questions & Answers
- → What type of pickles work best for frying?
Dill pickle spears are ideal for frying—their firm texture holds up well to the breading process and high heat. Look for spears that are thick-cut and well-drained. Bread and butter pickles can work too, though they'll be sweeter. Avoid pickle chips or slices, as spears provide the best crunch-to-dill ratio.
- → How do I keep fried pickles crispy?
Pat pickles completely dry before breading to prevent soggy coating. Use panko breadcrumbs for extra crunch. Fry at 350°F and don't overcrowd the pot. Drain on paper towels immediately. Serve right away while hot—fried pickles lose their signature crunch as they cool.
- → Can I bake these instead of deep frying?
Yes, though the texture won't be quite the same. Arrange breaded pickles on a baking sheet, spray with cooking oil, and bake at 425°F for 15-20 minutes, flipping halfway. The coating will be crispy but less golden than deep-fried versions. An air fryer works well too at 375°F for 8-10 minutes.
- → What dipping sauces go well with fried pickles?
Cool ranch dressing is the classic pairing, but options abound. Try spicy ranch for a kick, blue cheese for tangy contrast, or homemade remoulade for Southern flair. A simple garlic aioli or honey mustard dip also complements the salty-crunchy profile beautifully.
- → Can I make these gluten-free?
Absolutely. Substitute all-purpose flour with a 1:1 gluten-free flour blend and use certified gluten-free breadcrumbs. Panko-style gluten-free crumbs provide excellent texture. The frying technique remains identical, and the result is just as delicious and crispy.
- → How long can I store leftover fried pickles?
Fried pickles are best enjoyed immediately—their signature texture diminishes quickly. If you must store leftovers, refrigerate in an airtight container for up to 2 days. Reheat in a 400°F oven or air fryer for 5-8 minutes to restore crispness. Avoid microwaving, as they'll become soggy.